Part 3 – Testing and Measuring Results
Firstly we make sure that the services are running. Lets start all the required services and then launch the web browser and check the results.
sudo service hostapd start
sudo service thingsboard start
sudo service lighttpd start
now we are ready to browse to the web server. We hit the local IP and in my case, 192.168.10.1. I have RaspAP web GUI running on default port 80, and thingsboard running on port 8080. So, we browse to 192.168.10.1 for the raspAP web GUI.
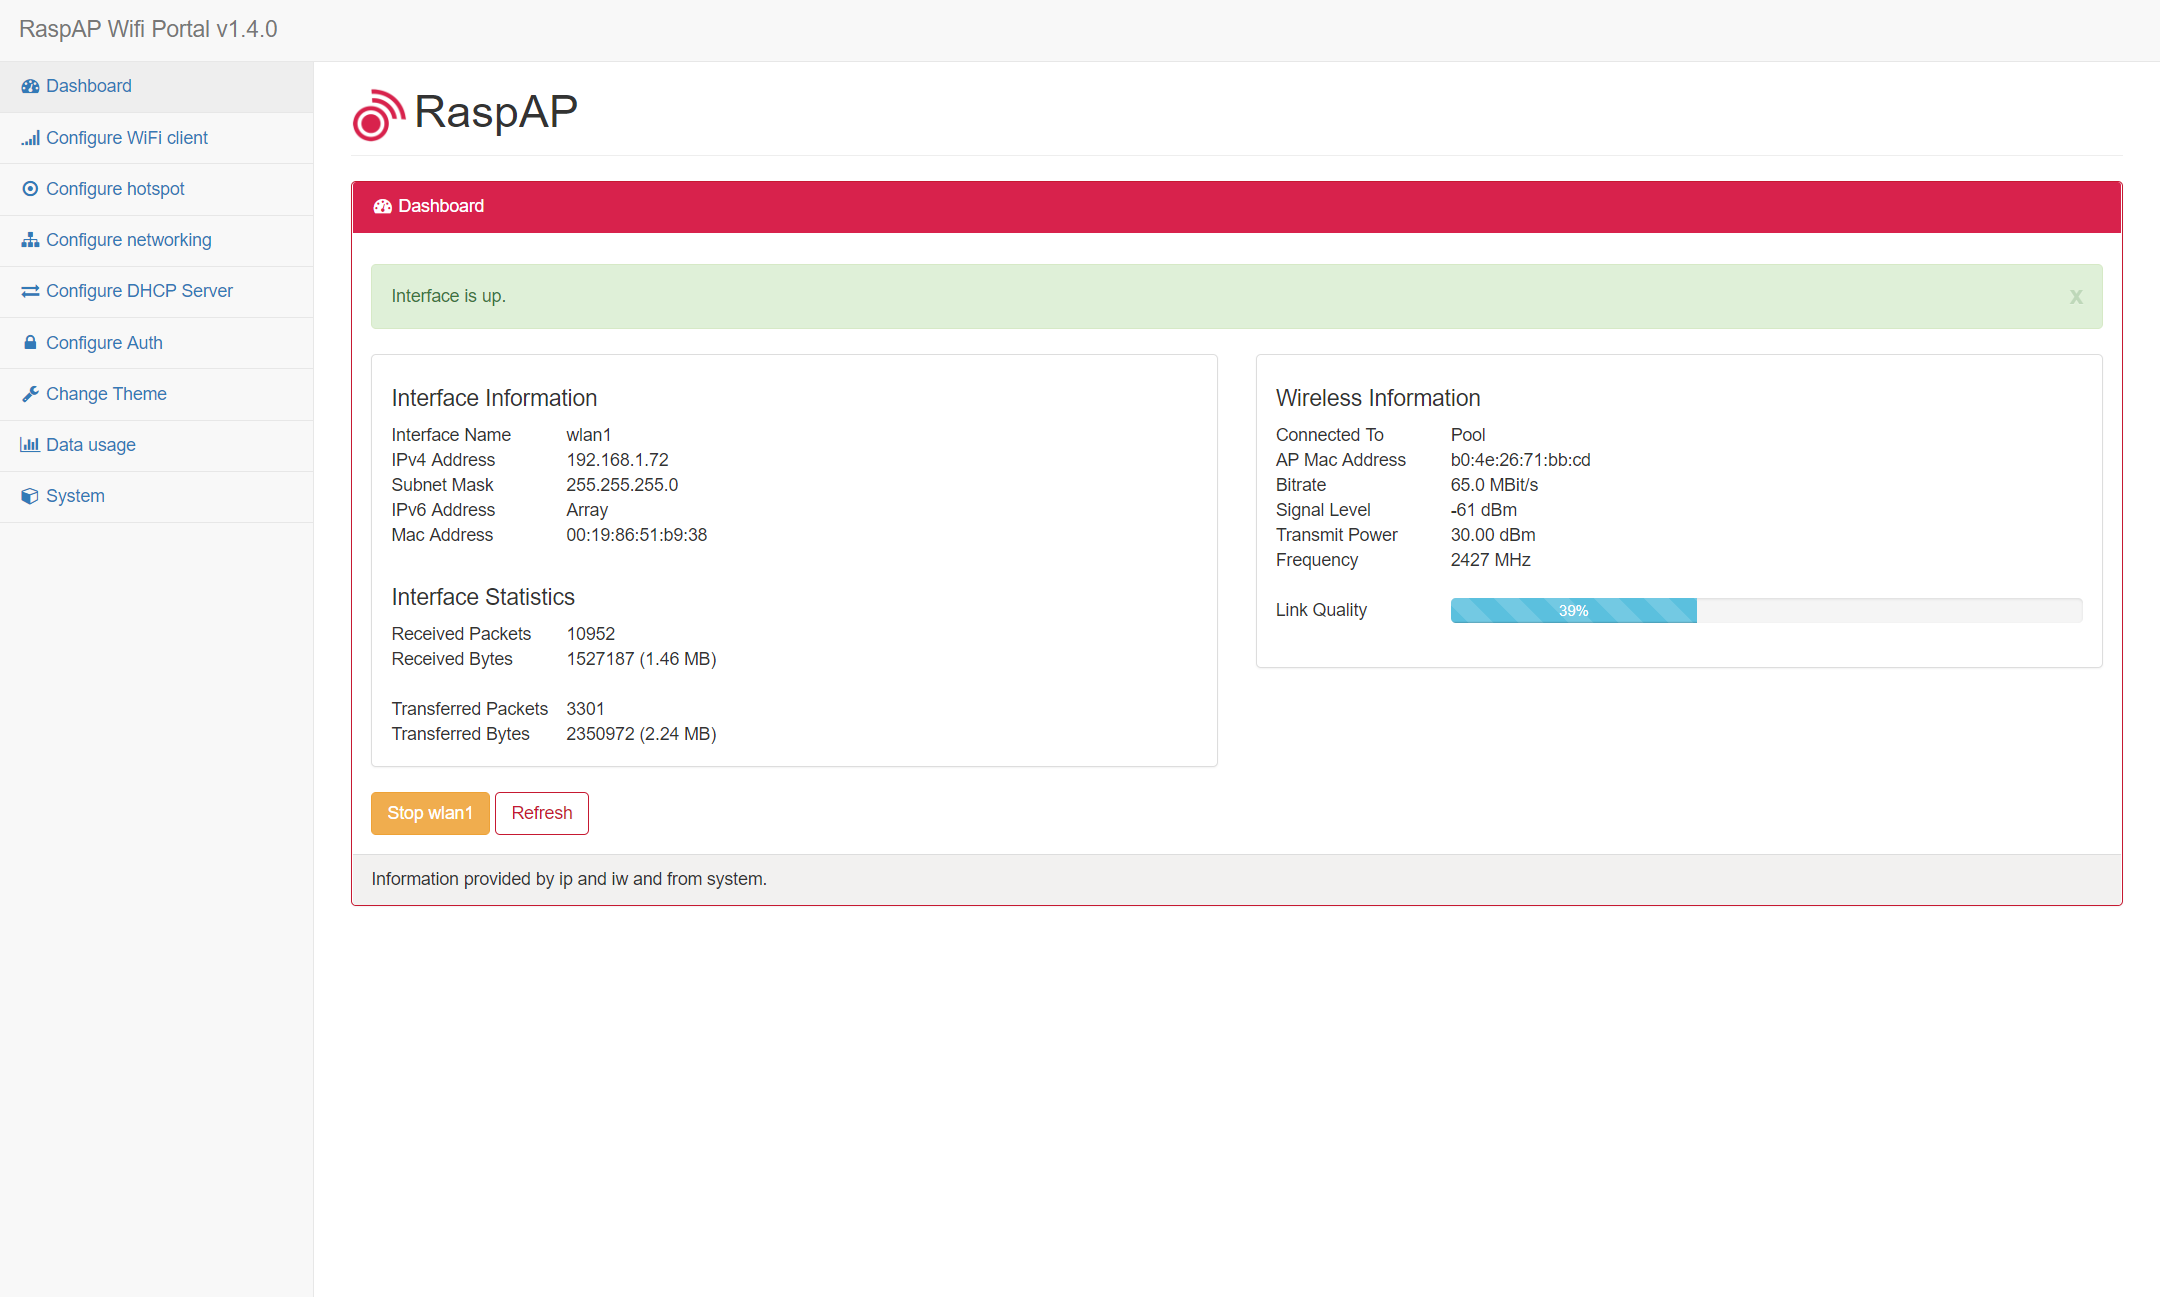
Here, we can connect to existing WiFi networks if they are within range, and configure the WiFi hotspod SSID and password. Advanced configuration can also be changed such as static IP, DHCP lease times etc which is pretty useless from an end users perspective. The main reason for this dashboard is to scan for available WiFi networks, and connect to them if they are within range so that the hotspod does not need to be used. The hostspot is only in place in case there is no WiFi network in range.
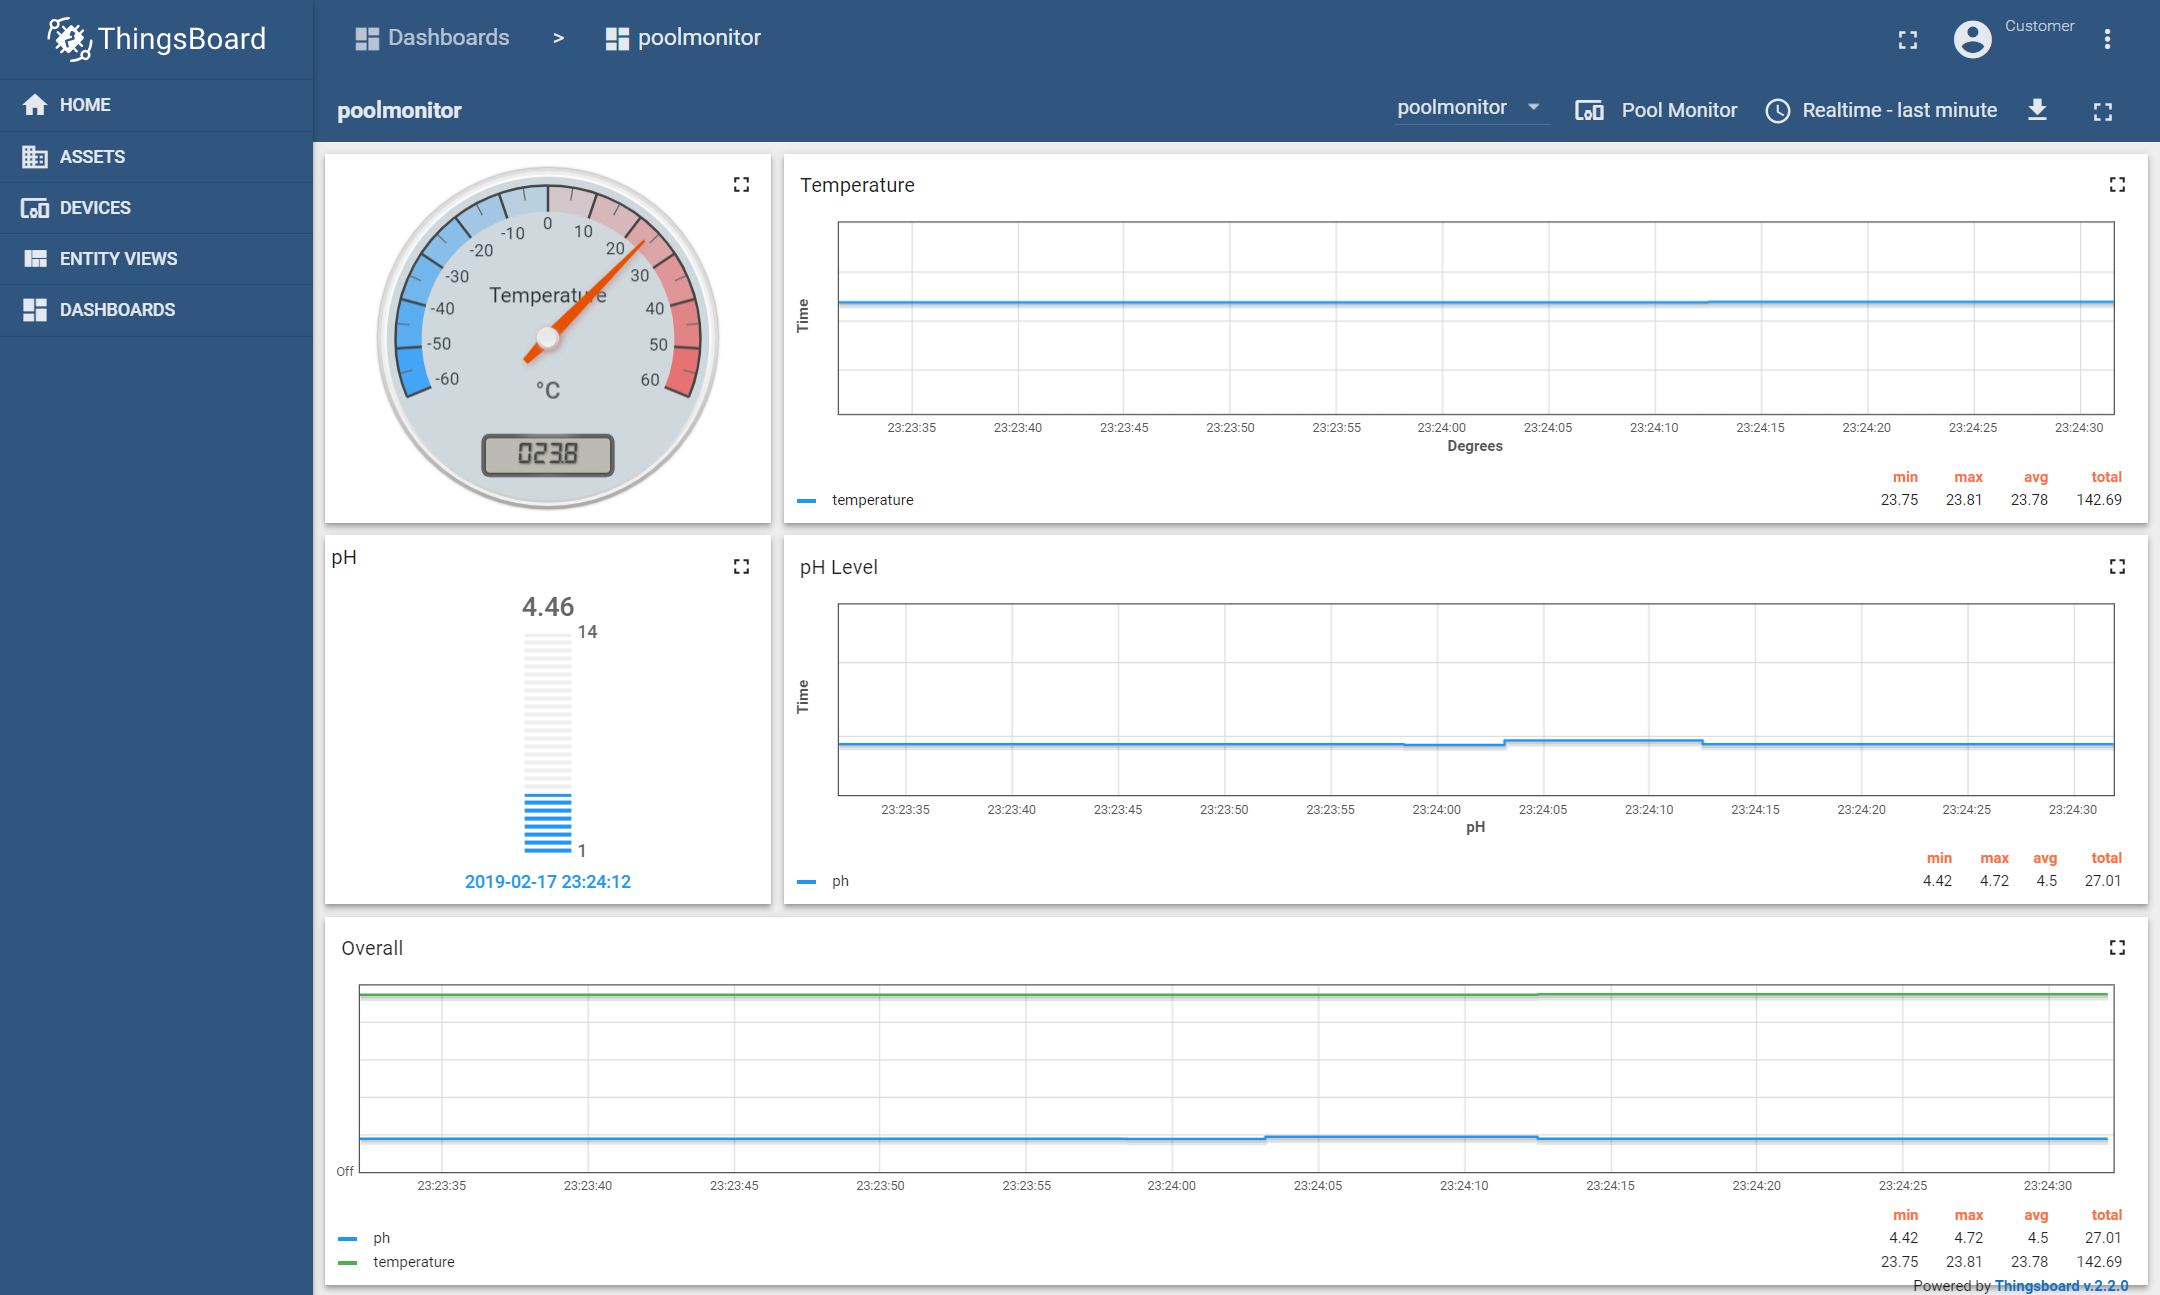
Now, we will launch thingsboard and take a look at the graphed data. As mentioned previously the script will only update hourly when the CRON job is run. So for testing purposes we manually execute the python script to push the data to thingsboard.
cd /path/to/script
sudo python update.py
Now we browse to 192.168.10.1:8080 to access the thingsboard web GUI panel. Thingsboard requires a bit of setup after initially installed such as creating the devices, creating users, creating dashboards and then assigning them all to the user which is pretty straight forward and self-explanatory once you play around with it.
And that’s basically it. I will still need to find out how to power the pool monitor for a target time of 1 week. Also testing the probe for a operating time before requiring re calibrating.
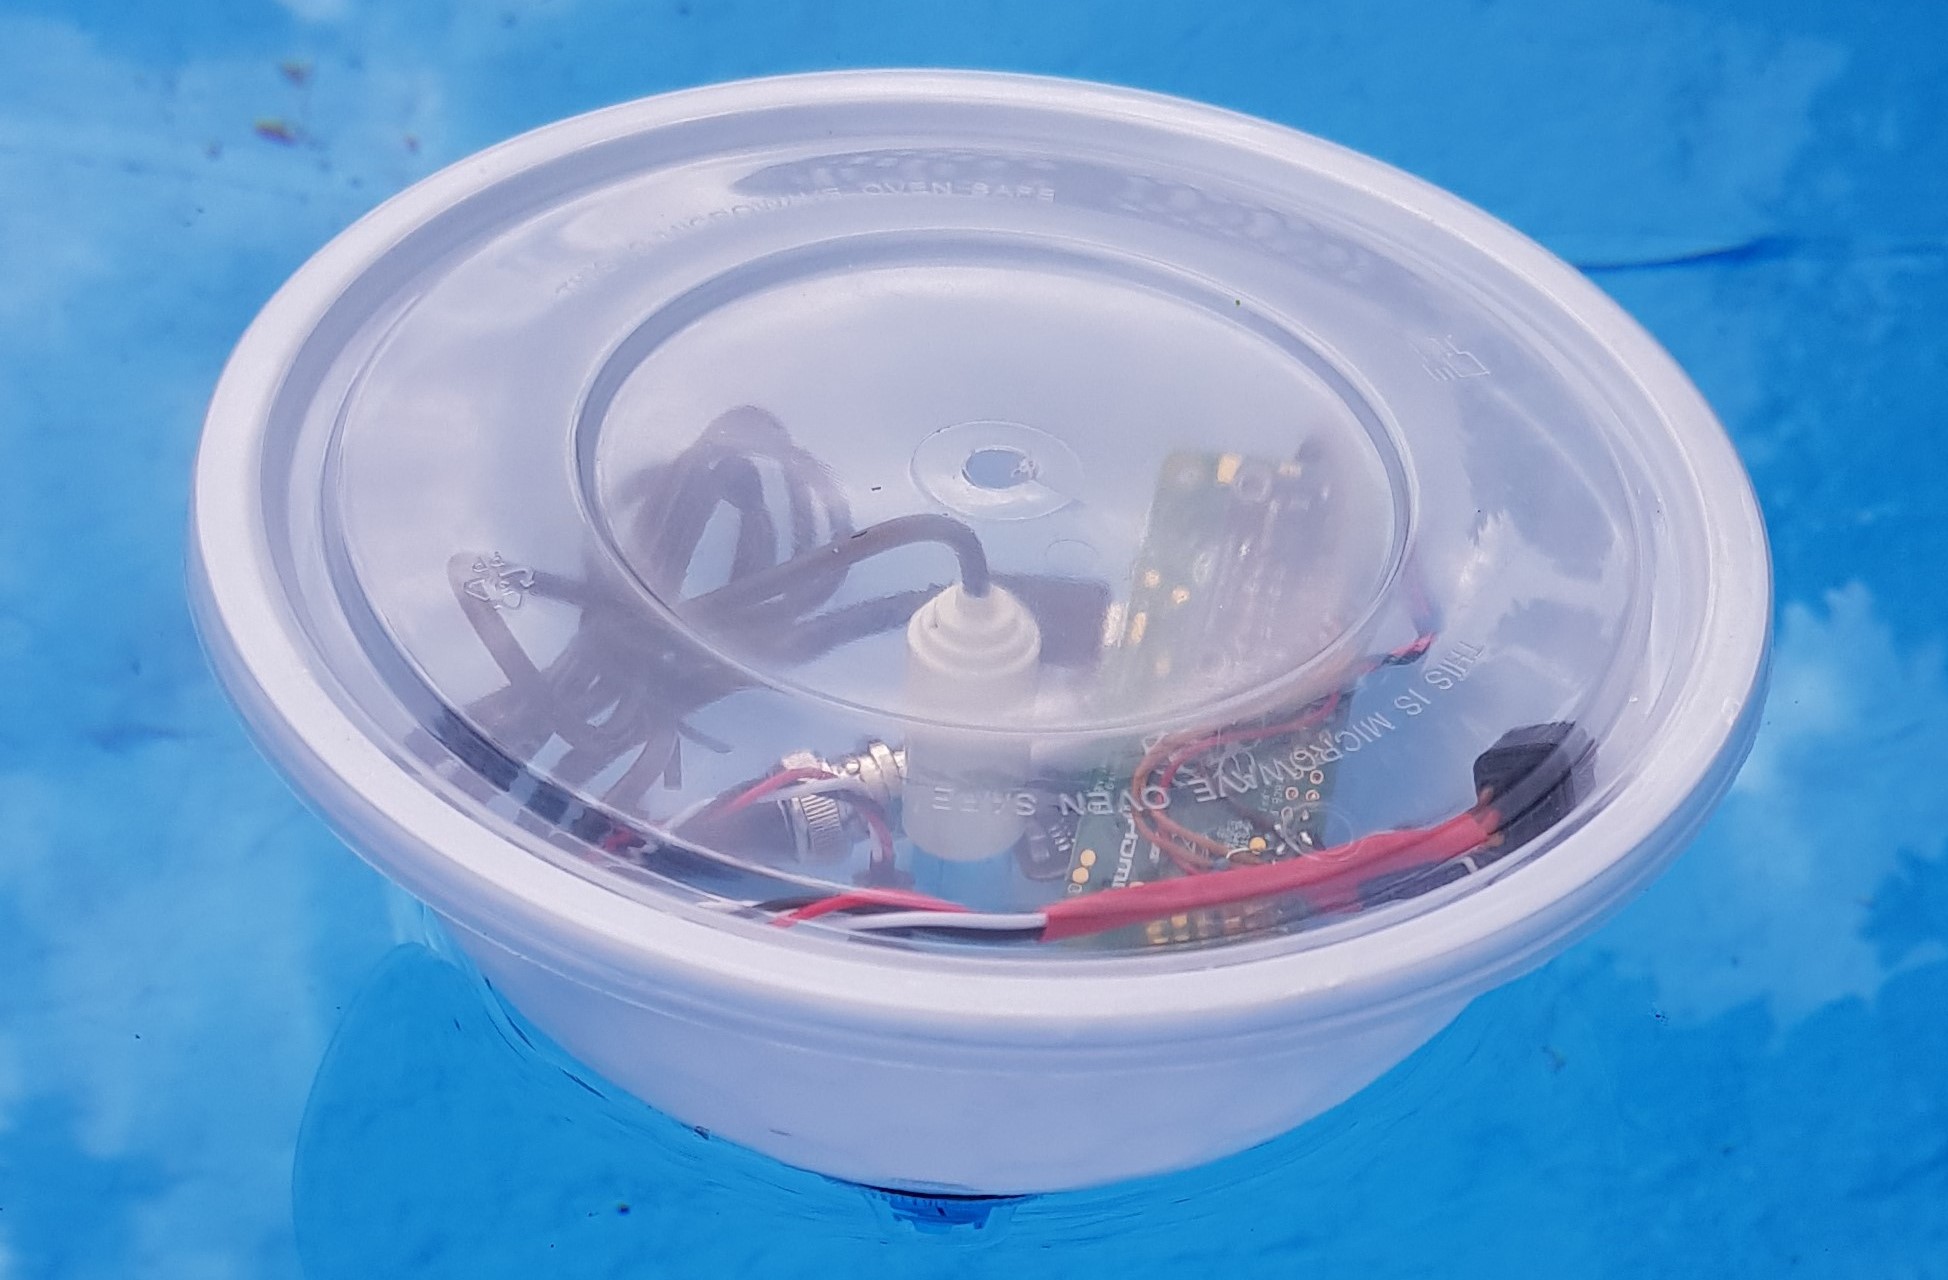
If you enjoyed this post and found it informative, give us a like and a share! Below I have added a the image file for the PI which is the complete Raspbian and everything installed and operating. Just connect the hardware and all should be good to go!


All Comments
Very useful and great idea. Easy to follow too. Thanks for the post!
Thank you 🙂