Rain Sensor
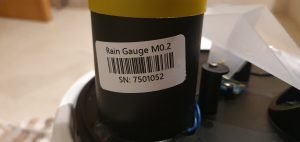
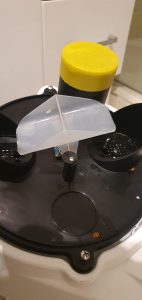
In this section we will connect and configure the rain sensor. The rain sensor is probably the easiest of the sensors to configure. The kestrel uses the traditional rain sensor method known as the “Tipping Bucket” as this is exactly how it works. It collects enough rain and when full, it will tip the rain out activating a switch to notify that the rain has tipped. This bucked will be a certain volume, lets say 10ml. So with each tip, we know that 10mL of water has been collected, or 0.2mm as indicated on label in the image below. This can be calculated based on how many tips the bucket performs each minute. This sensor is a simple open contact going closed to indicate that the bucket has tipped. The tips are then recorded and converted into data in esphome or Home assistant. Note a resistor is not required as there is already one of the board.

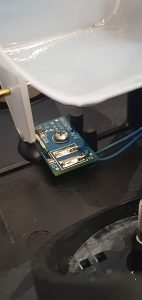
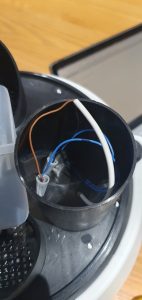

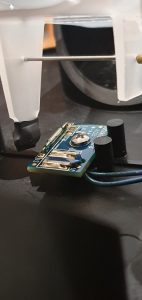
The rain sensor is the cable labelled “RAI” and consists of 2 wires, signal (brown) and ground (black). We connect the ground to the GND of the ESP32 and the signal to GPIO32 and is configured in esphome as a pulse_counter.
####Rainfall Start####
  - platform: pulse_counter
    pin:
      # Don't forget to add a pulling resistor, see README
      number: GPIO32
      mode: INPUT
    unit_of_measurement: 'mm'
    name: "${friendly_name} rain gauge"
    icon: 'mdi:weather-rainy'
    id: rain_gauge
    internal: true
    count_mode:
      rising_edge: DISABLE
      falling_edge: INCREMENT
    internal_filter: 13us
    update_interval: 1s
    filters:
      # Each 0.011" (0.2794mm) of rain causes one momentary contact closure
      - multiply: 0.2
    accuracy_decimals: 4

  - platform: integration
    name: "${friendly_name} rainfall per min"
    id: rain_per_min
    time_unit: min
    unit_of_measurement: 'mm'
    icon: 'mdi:weather-rainy'
    sensor: rain_gauge

  - platform: integration
    name: "${friendly_name} rainfall per hour"
    id: rain_per_hour
    time_unit: h
    unit_of_measurement: 'mm'
    icon: 'mdi:weather-rainy'
    sensor: rain_gauge

  - platform: integration
    name: "${friendly_name} rainfall per day"
    id: rain_per_daily
    time_unit: d
    unit_of_measurement: 'mm'
    icon: 'mdi:weather-rainy'
    sensor: rain_gauge

  - platform: total_daily_energy
    name: "${friendly_name} 24 Hour Rain"
    power_id: rain_gauge
    unit_of_measurement: 'mm'
    icon: 'mdi:weather-rainy'
    filters:
      - multiply: 60
      # x60 To convert to aggregated rain amount
####Rainfall End####
And, to reset the rain per minute integration, we add
####Rain Reset Timer Start####
interval:
  - interval: 60s
    then:
      - sensor.integration.reset: rain_per_min
####Rain Reset Timer END####
The above is pretty straight forward, it will reset this sensor every 60s, giving the rain per minute reading every minute and then resetting.
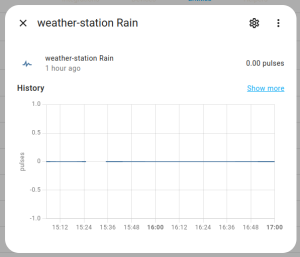
Now, open your device entities and you should be a new entity called “Rain” with 0.00 pulses. To test this, pour some water slowly into the rain catcher until you hear the bucket tip, check the pulse count and confirm it has increased.. This will continue to increase incrementally.
Wind Speed
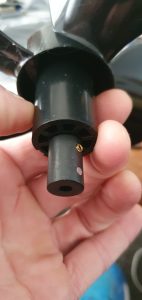
Just like the rain sensor, the wind speed is also very straight forward to integrate. The wind speed is measured using a magnet. Each rotation triggers a reed switch, indicating 1 rotation. This happens very fast and calculates how many rotations per minute to determine the wind speed.
This is again, a single wire (shared ground) connected to GPIO33 and again, uses the esphome pulse_counter integration.
  - platform: pulse_meter
    pin:
      number: GPIO33
      mode: INPUT
    id: wind_speed
    unit_of_measurement: 'knots'
    name: "Wind Speed"
    icon: 'mdi:weather-windy'
    internal_filter: 13us
    timeout: 5s
    filters:
      - multiply: 0.005560619
      - sliding_window_moving_average:
          window_size: 20
          send_every: 1

  - platform: copy
    name: 'Wind Speed Average'
    icon: 'mdi:weather-windy'
    id: wind_speed_avg
    source_id: wind_speed
    unit_of_measurement: 'knots'
    filters:
      - throttle_average: 5s
This needs further calibration and can be setup for your desired unit of measurement. Open your entities and test the wind speed with the newly added “Wind Speed” entity by spinning the anemometer. I left the update interval at 1 second to receive real time wind readings.
Use a secondary Anemometer to calibrate initially.


